
今回はプレイヤーの移動のスクリプトを作っていきます。
Playerオブジェクトの作成
Imagesフォルダの中からPlayer(idle)を選択し、InspectorでPixels Per Unitを100から400に変更します。
Unnaplied import settingsというWindowが表示されるので、Applyを選択します。
これによって画像が映し出されるサイズが変わっていきます。
同じようにPlayer(Attack)もPixels Per Unitを100から400に変更します。

ヒエラルキー上にドラッグ&ドロップをします。
Inspectorから名前をPlayerに変更します
ヒエラルキー上にドラッグ&ドロップをします。
Inspectorから名前をPlayerに変更します
Imagesファイルの中からPlayerImageをヒエラルキー上にドラッグ&ドロップします。
Scaleを設定します。
TagのところをPlayerに設定します。
今回の記事では使用しませんがTagは後々使うようになります。
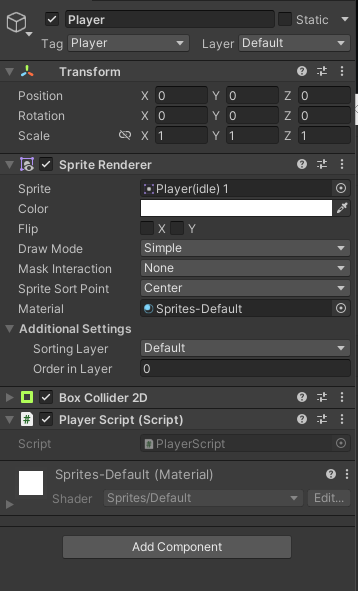
BoxCollider2Dを追加する
Add Componentから“Box Collider 2D”を追加します。
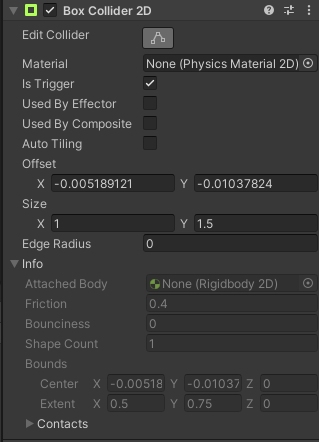
Box Collider 2Dは当たり判定を追加するコンポーネントです。
画像の通りのサイズだと当たり判定が大きいので調整します。
SizeをX1 Y1.5 にします。
Player Scriptの作成
Assetsの下にScriptsフォルダを作成します。
Scriptsフォルダの中で右クリック→Create→C#Scriptをクリックして新しいスクリプトを作成、名前を”PlayerScript”にします。
今回は、プレイヤーの移動の為のスクリプトを記述します。
PlayerScript
<code>using System.Collections;
using System.Collections.Generic;
using UnityEngine;

public class PlayerScript : MonoBehaviour
{
int speed=2;//移動スピード
Vector3 worldAngle;//角度を代入する

void Start(){}

 void Update()
    {
        if (Input.GetKey(KeyCode.UpArrow)) {//矢印上が押されている時に実行される
            if (this.transform.position.y < 5)
            {
                transform.position += new Vector3(0, speed * Time.deltaTime, 0);
            }
        }
        if (Input.GetKey(KeyCode.DownArrow)){//矢印下が押されている時に実行される
            if (this.transform.position.y > -5) {
                transform.position += new Vector3(0, -1* speed * Time.deltaTime, 0);
            }
        }
        if (Input.GetKey(KeyCode.LeftArrow)) {//矢印左が押されている時に実行される
            if (this.transform.position.x > -3) {
                worldAngle.y = 0f;//通常の向き
              this.transform.localEulerAngles = worldAngle;//自分の角度に代入する
              transform.position += new Vector3(-1 * speed * Time.deltaTime, 0, 0);
            }
        }
        if (Input.GetKey(KeyCode.RightArrow)) {//矢印右が押されている時に実行される
            if (this.transform.position.x < 3) {
                worldAngle.y = -180f;//右向きの角度
              this.transform.localEulerAngles = worldAngle;//自分の角度に代入
              transform.position += new Vector3(speed * Time.deltaTime, 0, 0);
            }
  }
}
} </code>
Input.GetKeyで押されている状態のボタンを取得します。
押されている間だけ、transform.positionに各方向の座標を足していって移動させていきます。
画面上からはみ出さないようにY軸では5~-5まで、X軸は3~-3までの範囲でしか移動できないように制限しています。
左右移動の時はプレイヤーの向きを変えるためにworldAngle.yでY軸の角度を変更し、その値をthis.transform.localEulerAnglesに代入することで反映させます。
PlayerのInspectorを開いてドラッグ&ドロップでアタッチします。

これでプレイヤーキャラクターの移動ができるようになりました。
次回は敵キャラの生成を実装していきます。


コメント